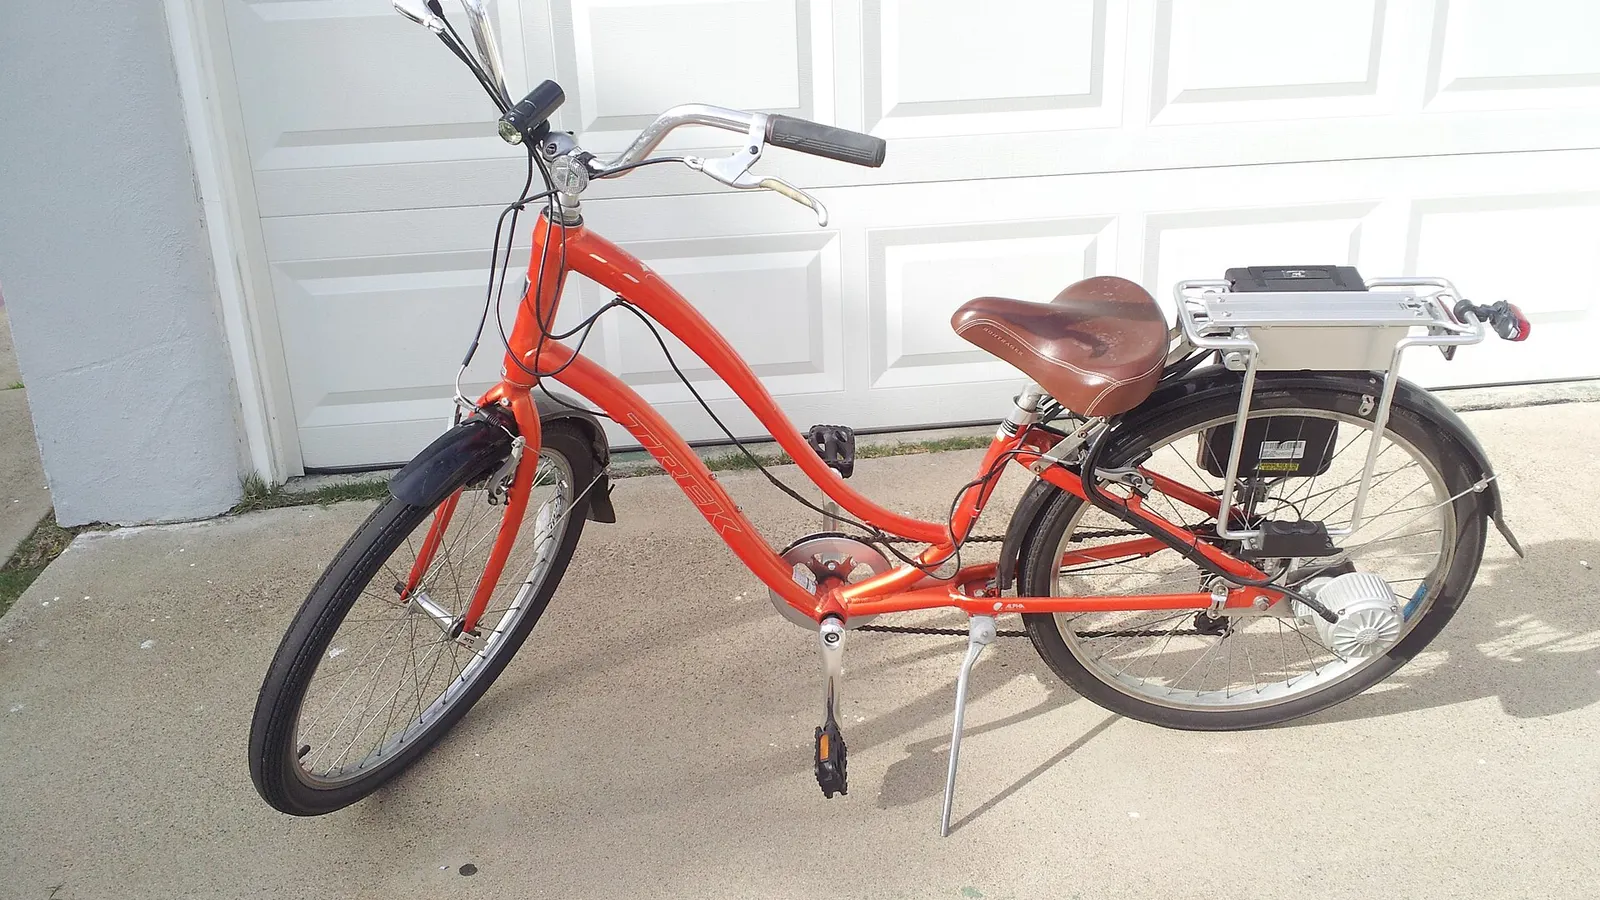
Bafang BBS02B, BBSHD, and hub motor kits compared — installation, battery selection, frame compatibility, and Australian legal compliance.
An e-bike conversion kit turns your existing bicycle into an electric bike. If you already own a bike you love — the geometry fits, the components are dialled, the frame has sentimental value — a conversion kit adds electric assist without replacing the whole machine.
What Is a Conversion Kit?
A conversion kit includes the motor (hub or mid-drive), battery, controller, display, throttle or pedal-assist sensor, wiring, and mounting hardware. You supply the bicycle.
The two main types:
Hub Motor Kits
The motor replaces your existing front or rear wheel hub. The wheel arrives pre-built with the motor laced into the spokes. You swap your old wheel for the motorised one, mount the battery on the frame, and wire the controller.
Pros:
- Simple installation (2–4 hours for a first-timer)
- No modification to the bike's drivetrain
- Cheaper than mid-drive kits ($400–$1,200 for a complete kit)
- Low maintenance — sealed motor, minimal wear on chain and gears
Cons:
- Adds weight to one end of the bike (front or rear heavy)
- Does not leverage the bike's gears — performance on steep hills is limited
- Less natural pedal feel than mid-drive
- Rear hub kits require re-dishing or respacing the wheel to fit the cassette
Popular hub motor kits in Australia:
- Bafang 500 W rear hub kit: reliable, widely available, suits commuter and hybrid bikes
- Voilamart 1000 W front hub kit: affordable entry-level kit for flat-terrain riders
- EBIKELING 500 W direct-drive kit: budget-friendly, includes basic display and throttle
Mid-Drive Kits
The motor mounts at the bottom bracket (where the pedals attach) and drives the chain directly. This means the motor's power runs through the bike's gears, multiplying torque on hills.
Pros:
- Works through the gears — better hill climbing than hub motors
- Centred weight distribution — feels more natural
- More efficient — uses less battery per kilometre, especially on hills
- Higher torque options available (750 W–1500 W)
Cons:
- More complex installation (4–8 hours) — requires bottom bracket removal and may need frame-specific adapters
- Accelerates chain and cassette wear (motor torque plus pedal torque through the same chain)
- More expensive ($600–$2,000 for a complete kit)
- Not all frames are compatible — the bottom bracket shell must match the kit's requirements
Popular mid-drive kits in Australia:
- Bafang BBS02B (750 W): the most popular mid-drive kit worldwide. Fits most 68–73 mm bottom brackets. Strong, reliable, well-supported.
- Bafang BBSHD (1000 W): the heavy-duty option. Suited to cargo bikes, steep terrain, and heavier riders. Requires a strong chain (preferably single-speed or IGH).
- Tongsheng TSDZ2 (500 W): torque-sensing mid-drive. More natural pedal feel than Bafang's cadence-sensing system. Quieter, smoother, less raw power.
Battery Selection
The battery is the most expensive and most important component in the kit. Key specs:
| Spec | What it means | Recommended |
|---|---|---|
| Voltage (V) | Determines motor speed and compatibility | 36 V (commuter), 48 V (performance), 52 V (high power) |
| Capacity (Ah) | How much energy is stored | 10–14 Ah for commuting, 17–21 Ah for longer range |
| Watt-hours (Wh) | V × Ah = total energy | 400–750 Wh for most conversions |
| Cell brand | Quality and longevity | Samsung, LG, Panasonic (avoid no-name cells) |
| BMS | Battery Management System | Must include overcharge, over-discharge, and short-circuit protection |
Battery mounting options:
- Triangle bag: fits inside the frame triangle. Low centre of gravity, good weight distribution. Requires enough frame space.
- Rear rack mount: sits on a luggage rack behind the seat. Easy to install but raises the centre of gravity.
- Down tube mount: bolts to the downtube with custom brackets. Clean look, good placement, may need frame-specific drilling (not recommended for carbon frames).
Is Your Bike Compatible?
Not every bicycle is suitable for conversion. Check:
- Frame material: steel and aluminium frames are ideal. Carbon frames are risky — the added motor stress can crack carbon, and drilling for mounts is not recommended.
- Bottom bracket (mid-drive kits): most Bafang kits fit 68–73 mm BSA threaded bottom brackets. Pressfit, BB30, and other press-in standards need adapters or may not be compatible.
- Dropout spacing (hub motor kits): measure the distance between the fork ends (front) or rear dropouts. Standard is 100 mm front, 135 mm rear. Thru-axle frames need specific kits.
- Brake mounts: hydraulic disc brakes are recommended for the added speed and weight. If your bike has rim brakes, upgrading to disc brakes is advised.
- Frame strength: a conversion adds 5–10 kg and increases riding speed. Lightweight racing frames may not handle the stress. A sturdy commuter, hybrid, or mountain bike frame is ideal.
Legal Compliance in Australia
To ride legally on public roads and paths in Australia, your converted e-bike must comply with EN 15194:
- Maximum continuous rated power: 250 W
- Pedal-assist only: the motor must cut off when you stop pedalling (no throttle-only mode on public roads)
- Speed limit: motor assistance must cut off at 25 km/h
Many conversion kits are sold as 500 W, 750 W, or 1000 W — these exceed the legal limit for public road use. You can use them on private property, or you can program the controller to limit output to 250 W and 25 km/h for road use (most Bafang kits support this via the display settings or programming cable).
Important: riding an overpowered e-bike on public roads may void your insurance, attract fines, and in the event of an accident, expose you to liability as an unregistered motor vehicle operator.
Installation Tips
- Watch multiple installation videos for your specific kit before starting. Every kit has quirks.
- Invest in the right tools: a bottom bracket removal tool (for mid-drive), a crank puller, Allen keys, torque wrench, and cable ties.
- Route cables cleanly. Zip-tie wiring along the frame tubes. Messy cables snag on branches and look terrible.
- Test before riding. Run the motor on a stand, check that the brakes cut the motor (motor inhibitor switches on the brake levers), and test all assist levels.
- Do a short test ride in a car park before hitting traffic. Check braking distance, throttle response, and handling.
Bottom Line
A conversion kit is the most cost-effective way to get electric assist — typically $800–$2,000 total versus $2,500–$6,000 for a factory-built e-bike. The trade-off is DIY installation, less refined integration, and the legal grey area of higher-powered kits. For riders who want to electrify a bike they already own, a quality kit from Bafang or Tongsheng is a proven path.
Need Parts or Upgrades?
Find batteries, chargers, conversion kits, tyres and brakes for e-bikes, scooters and more.
Shop Batteries, Parts & Kits →