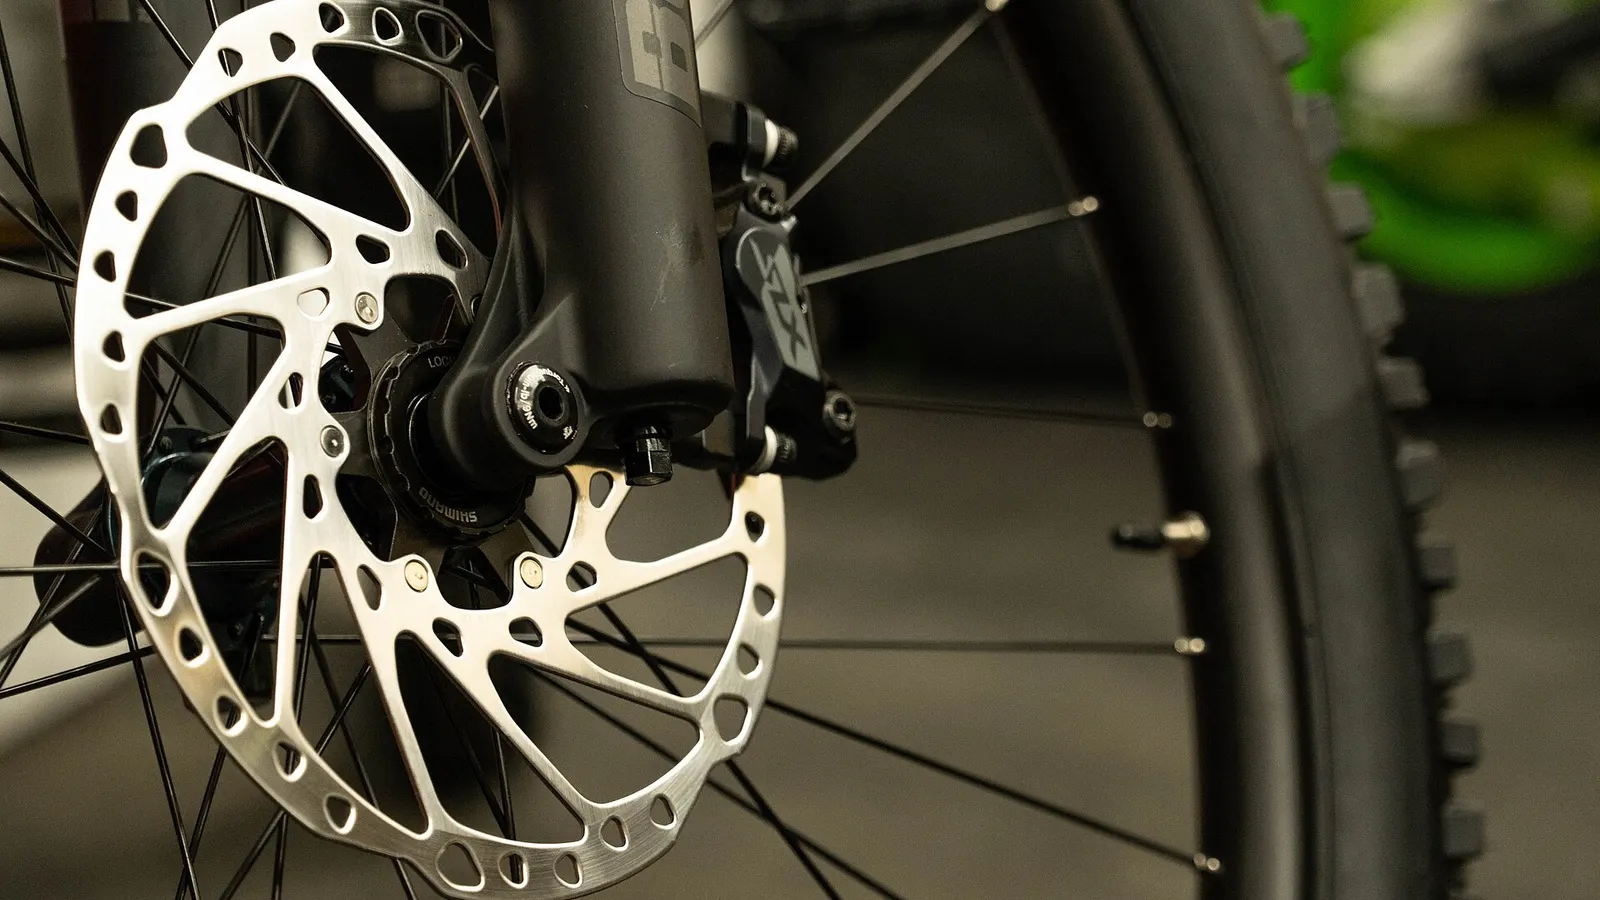
When to replace brake pads and rotors, organic vs metallic compounds, DIY replacement steps, and brake bedding for e-bikes.
Brake Pad and Rotor Replacement on E-Bikes: When to Change, Organic vs Metallic, and DIY Guide
Brakes are the most critical safety component on an e-bike. The extra weight and higher average speeds of electric bikes mean your brakes work harder than on a regular bicycle. Knowing when to replace pads and rotors and how to do it yourself saves money and keeps you safe.
Why E-Bike Brakes Wear Faster
A typical e-bike with rider, battery, and cargo weighs 30 to 50kg more than an equivalent non-electric bicycle. Physics dictates that stopping a heavier object from the same speed requires more braking force, which means more heat and more wear on pads and rotors.
E-bike riders also tend to ride at higher average speeds thanks to motor assist. Stopping from 30km/h requires roughly twice the braking energy as stopping from 20km/h. Combined with the extra weight, e-bike brake pads may wear two to three times faster than on a regular bicycle.
Most e-bike commuters in Australia should expect to replace brake pads every 1,500 to 3,000 kilometres, though this varies significantly with terrain, riding style, and weather. Riders in hilly areas like the Blue Mountains, Adelaide Hills, or Tasmania's west coast will wear pads faster than riders on flat terrain.
When to Replace Brake Pads
Check your brake pads monthly. Remove the wheel and look at the pad thickness. Most disc brake pads have a metal backing plate and a layer of friction material bonded to it.
Replace pads when:
- The friction material is less than 1mm thick (about the thickness of a credit card)
- The pad surface is glazed, shiny, or contaminated with oil
- Braking performance has noticeably decreased
- You hear metal-on-metal scraping when braking (the backing plate is contacting the rotor, which means the friction material is completely gone and the rotor is being damaged)
Do not wait until pads are completely worn. Running pads down to the backing plate scores the rotor surface, requiring rotor replacement as well. Replacing pads at 1mm thickness costs $15 to $40 per set. Replacing a scored rotor costs $30 to $80 on top of that.
Organic vs Metallic Brake Pads
Disc brake pads come in two main compound types, and the choice matters for e-bike use:
Organic (resin) pads use a mixture of fibres (aramid, carbon, rubber) bound with resin. They offer:
- Quieter braking with less squeal
- Better initial bite from cold
- Gentler on rotors, extending rotor life
- Lower operating temperature
- Faster wear, especially in wet conditions
Organic pads are a good choice for light to moderate urban commuting on flat terrain. They feel smooth and predictable but wear out faster under the sustained braking loads of heavy e-bikes on hills.
Metallic (sintered) pads use metal particles (copper, iron, steel) compressed under high pressure. They offer:
- Much longer pad life (roughly two to three times organic)
- Better performance in wet conditions
- Better heat dissipation on long descents
- Consistent performance as they heat up
- More noise, especially when cold or wet
- Faster rotor wear compared to organic
For e-bike use in Australia, metallic pads are the better choice for most riders. The longer life alone justifies the slightly higher cost (typically $5 to $15 more per set than organic). If you ride in hilly areas or in the rain, metallic pads maintain their stopping power where organic pads fade.
Semi-metallic pads blend organic and metallic materials, offering a compromise. They are less common in the bicycle world but appear in some aftermarket options.
When to Replace Rotors
Disc brake rotors are consumable items that wear down over time. Check rotor thickness periodically with a vernier calliper or look for the minimum thickness stamped on the rotor.
Replace rotors when:
- Thickness is at or below the minimum marked on the rotor (typically 1.5mm; new rotors are usually 1.8mm to 2.0mm)
- The braking surface has a visible groove or lip at the edges
- The rotor is warped (wobbles when spinning, causing pulsing braking)
- The surface is scored with deep scratches from worn-out pads
- The rotor has visible cracks
Rotors typically last 10,000 to 20,000 kilometres on an e-bike, though this depends on pad compound, riding conditions, and braking habits. Metallic pads wear rotors faster than organic.
Rotor sizes for e-bikes are typically 160mm or 180mm in diameter. Some high-performance setups use 203mm rotors. Larger rotors provide better heat dissipation and more braking power, which benefits heavier e-bikes. If your bike came with 160mm rotors and you feel the brakes are inadequate, upgrading to 180mm rotors (with appropriate adapter brackets) is a worthwhile modification. The cost is around $30 to $60 per rotor plus $10 to $15 for the adapter bracket.
DIY Brake Pad Replacement
Replacing brake pads is one of the simplest maintenance tasks on an e-bike. You need minimal tools and the process takes about 15 minutes per brake.
Tools needed:
- Allen keys (usually 3mm or 4mm, or a T25 Torx depending on the calliper)
- Flat-blade screwdriver or pad spreader tool
- Clean rag
- Isopropyl alcohol (rubbing alcohol)
Step 1: Remove the wheel to access the calliper.
Step 2: Remove the pad retention bolt or clip. On Shimano callipers, a split pin and bolt hold the pads. On other brands, a screw or clip secures them. Note the orientation of the pads and any springs or spacers.
Step 3: Pull the old pads out. They usually slide out from the top or bottom of the calliper.
Step 4: Push the pistons back. With the pads removed, use a clean flat-blade screwdriver or dedicated piston press tool to gently push the calliper pistons back into the calliper body. This makes room for the thicker new pads. Be gentle and push evenly.
Step 5: Clean the calliper. Spray the inside of the calliper with isopropyl alcohol and wipe with a clean rag. Do not use WD-40, degreaser, or any oil-based product near brakes.
Step 6: Install the new pads. Slide them in with any spring or spacer in the correct position. Replace the retention bolt or clip.
Step 7: Reinstall the wheel and test. Squeeze the brake lever several times to bring the pads into contact with the rotor. The lever may feel spongy for the first few squeezes as the pistons advance.
Step 8: Bed in the new pads. Ride at moderate speed and perform 10 to 15 moderate stops from about 25km/h. Avoid heavy braking during the first 50 kilometres. This transfers a layer of pad material to the rotor surface for optimal braking performance.
DIY Rotor Replacement
Rotor replacement is straightforward with the right tools.
Tools needed:
- T25 Torx wrench (for 6-bolt rotors) or lockring tool (for centrelock rotors)
- Torque wrench (recommended)
6-bolt rotors: Remove the six Torx bolts holding the rotor to the hub. Install the new rotor, tightening bolts in a star pattern to the manufacturer's specified torque (typically 4 to 6Nm). Apply a small amount of threadlocker (blue Loctite 243) to the bolts if the manufacturer recommends it.
Centrelock rotors: Use a centrelock lockring tool (same tool as a cassette lockring tool for external spline, or a bottom bracket tool for internal spline) to remove the lockring. Swap the rotor and retighten the lockring to the specified torque (typically 40Nm).
After replacing a rotor, you may need to realign the calliper. Loosen the calliper mounting bolts, squeeze the brake lever to centre the calliper on the rotor, and retighten the bolts while holding the lever. Spin the wheel and check for rubbing.
Avoiding Contamination
Brake contamination is the most common reason for poor braking performance and squealing. Oil, grease, chain lube, or silicone sprays on the rotor or pad surface dramatically reduce braking power.
Prevent contamination by:
- Never spraying chain lube, WD-40, or degreaser near the brakes
- Handling pads and rotors with clean hands
- Placing a rag or cardboard over the brake calliper when working on the chain or drivetrain
- Cleaning rotors with isopropyl alcohol after any maintenance near the brakes
If pads become contaminated, they usually cannot be fully cleaned and should be replaced. Contaminated rotors can sometimes be saved by scrubbing with isopropyl alcohol and a clean abrasive pad (ScotchBrite type), then re-bedding with new pads.
Cost Summary
Typical costs for brake maintenance on an e-bike in Australia:
- Brake pads (pair): $15 to $50 AUD depending on brand and compound
- Disc rotors: $25 to $80 AUD each depending on size and brand
- Professional pad replacement: $20 to $40 labour per brake at a bike shop
- Professional rotor replacement: $30 to $50 labour per brake
- Calliper bleed (hydraulic brakes): $30 to $60 per brake
Doing it yourself saves $40 to $100 per service and keeps you familiar with your brakes. Given how often e-bike brakes need attention, it is a skill well worth learning.
Need Parts or Upgrades?
Find batteries, chargers, conversion kits, tyres and brakes for e-bikes, scooters and more.
Shop Batteries, Parts & Kits →