Front vs rear hub motors, wattage options, battery compatibility, and a step-by-step DIY installation guide for Australian cyclists.
Hub Motor Conversion Kits: Front vs Rear Wheel, Wattage, Compatibility, and DIY Installation
Hub motor conversion kits are the simplest way to turn a regular bicycle into an electric bike. The motor is built into the wheel hub, so installation requires no modification to your frame or drivetrain. This guide walks through the types of hub motors available, how to choose one, and what the installation process looks like.
How Hub Motors Work
A hub motor is a brushless DC motor built into the centre of a bicycle wheel. The motor spins the wheel directly without using the chain or gears. This makes them mechanically simple with very few moving parts to wear out.
There are two main types:
Geared hub motors use a small, high-speed internal motor connected to the wheel through planetary gears. They are lighter (typically 2.5kg to 4kg), smaller in diameter, and freewheel when unpowered, meaning they add minimal drag when you pedal without assist. They are best suited for commuting and casual riding at power levels up to about 500W.
Direct-drive (gearless) hub motors are simply a large motor where the wheel axle is the stator and the outer shell is the rotor. They are heavier (4kg to 7kg), larger in diameter, and do not freewheel, creating slight drag when unpowered. However, they are virtually silent, handle higher power levels well, and can support regenerative braking. They suit riders who want 500W or more and do not mind the extra weight.
Front Wheel vs Rear Wheel
Hub motor kits are available for either the front or rear wheel. Each has distinct advantages:
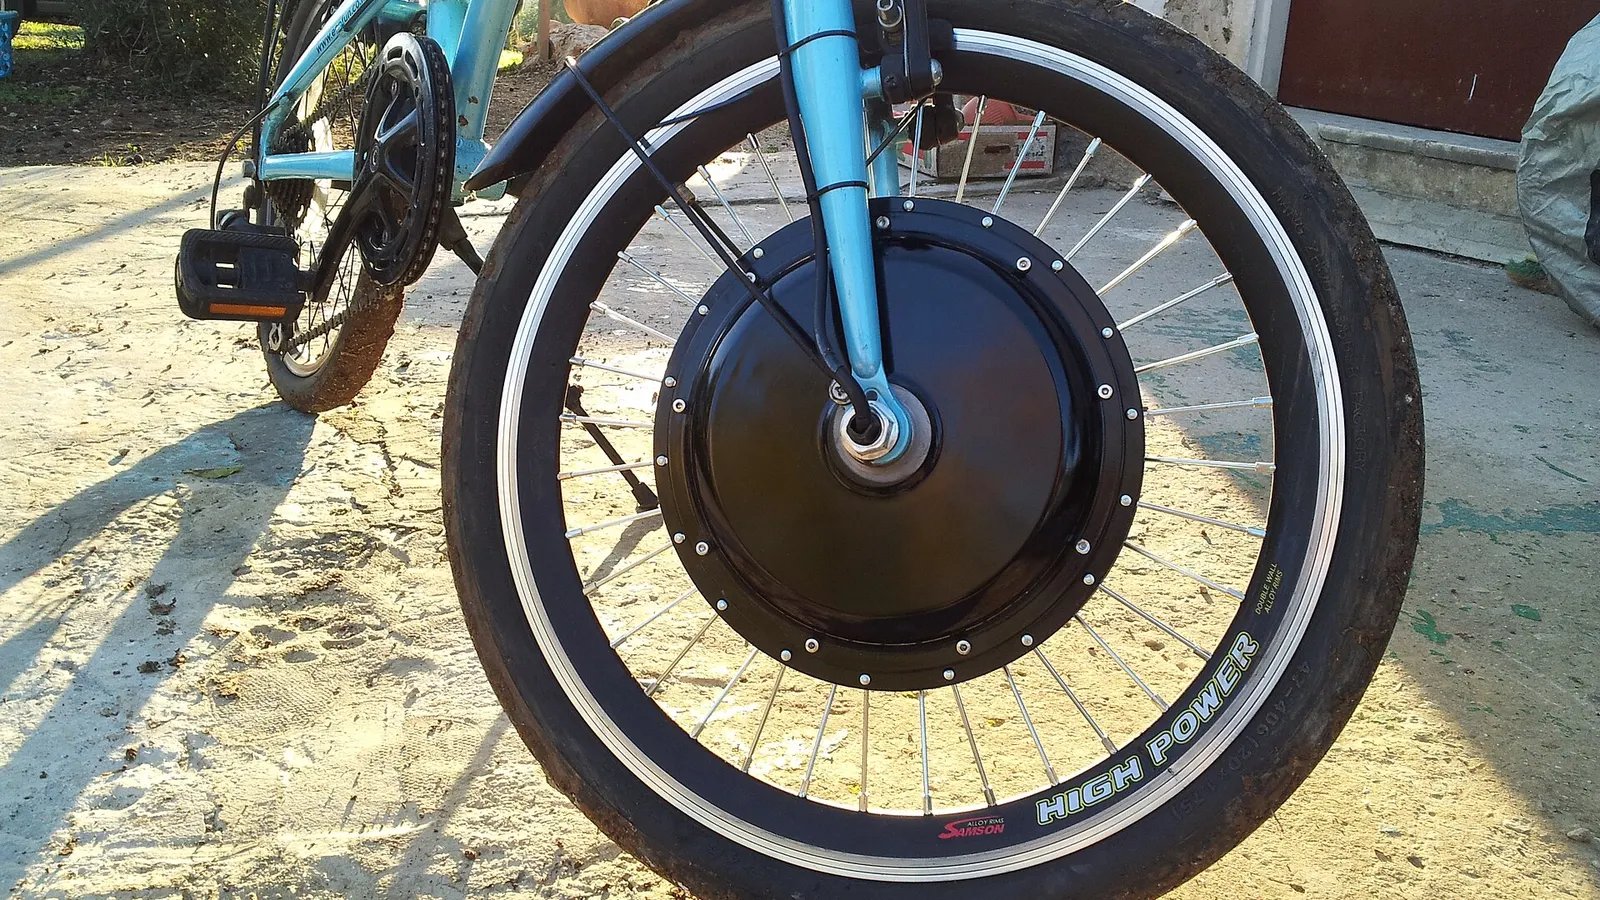
Front hub motors are the easiest to install because they do not interact with the drivetrain at all. You simply replace your front wheel, mount the controller, and wire it up. Front motors create an all-wheel-drive effect when combined with your pedalling on the rear wheel, which can improve traction in wet conditions.
The downside is handling. A heavy motor on the front wheel can make the steering feel different, especially at low speeds. On loose surfaces like gravel, a powerful front motor can cause the front wheel to spin. Front motors work best at lower power levels (250W to 500W) on bikes with sturdy front forks. Do not install a powerful front hub motor on a bicycle with a suspension fork unless the fork is specifically rated for it.
Rear hub motors feel more natural because the power comes from the rear wheel, like a motorcycle or car. Weight distribution is better since the motor sits over the rear axle near the rider's weight. Rear motors handle higher power levels without affecting steering.
Installation is more involved because the rear wheel interacts with the cassette, derailleur, and chain. You will need to transfer your existing cassette to the new motorised wheel and potentially adjust your derailleur. Some rear hub motor wheels come with a freewheel or cassette pre-installed.
For most conversion projects, a rear hub motor offers the better riding experience. Front motors are the pick when simplicity is the priority and power requirements are modest.
Choosing the Right Wattage
Hub motor kits are sold in various power ratings. Common options in Australia include:
250W is the legal maximum for road-legal pedelecs in Australia. A 250W geared hub motor provides gentle assistance that makes commuting easier without dramatically changing the riding experience. Suitable for flat to gently rolling terrain and riders under about 90kg.
500W provides noticeably more assistance and handles moderate hills better. Popular for commuters in hilly areas and riders who want to arrive at work without breaking a sweat. At this power level, a rear geared hub motor is the most practical choice.
750W to 1,000W is where hub motors start to feel genuinely powerful. Good hill climbing, faster acceleration, and the ability to maintain speed with less pedalling effort. Direct-drive motors become a better option at this power level for their durability and heat management. Note that running more than 250W on public roads in Australia exceeds the legal pedelec limit.
1,500W and above is electric motorcycle territory. These are large, heavy direct-drive motors suited for private property, off-road use, or purpose-built electric mopeds. Not suitable for standard bicycle frames without significant reinforcement.
For a typical commuter conversion in Australia, a 250W to 500W geared rear hub motor with a 36V or 48V battery is the practical sweet spot.
Compatibility Considerations
Before buying a kit, check these compatibility points on your bicycle:
Wheel size: Hub motor kits come pre-laced into specific wheel sizes. Common sizes are 26 inch, 27.5 inch, 700c (for road and hybrid bikes), and 20 inch (for folding bikes). Measure your existing wheel or check the tyre sidewall for the size marking.
Axle width and type: Front forks typically accept 100mm axle spacing with a 9mm quick-release or 12mm thru-axle. Rear dropouts are usually 135mm for quick-release or 142mm for thru-axle. Hub motor axle nuts require open dropouts (not thru-axle), although adapters exist for some frames. Check whether your dropouts are horizontal or vertical, as horizontal dropouts with a quick-release can allow the motor to twist under power. Torque arms (included with most quality kits) prevent this.
Brake type: If your bike has disc brakes, you need a hub motor wheel with a disc rotor mount. If you have rim brakes, you need a standard wheel with a braking surface. Do not mix these.
Battery mounting: You need somewhere to mount a battery. Common options are a rear rack (easy but raises the centre of gravity), a frame triangle bag (best for weight distribution), or a downtube mount (neat but requires frame bottle cage mounts). Ensure your frame has space for the battery style you choose.
Controller and wiring: The controller box is typically 15cm by 8cm by 4cm and needs to be mounted somewhere protected. Common locations are inside a frame bag, on the rear rack, or strapped to the downtube. Plan your cable routing before you start.
What Comes in a Kit
A typical hub motor conversion kit includes:
- Motorised wheel (front or rear, pre-laced with spokes and rim)
- Controller (manages power delivery from battery to motor)
- Display (handlebar-mounted, shows speed, battery level, assist mode)
- Throttle (thumb or twist grip)
- Brake levers or brake sensors (cut motor power when braking)
- Pedal assist sensor (PAS, detects when you are pedalling)
- Wiring harness and connectors
- Torque arm (prevents axle rotation in the dropout)
You will need to supply separately:
- Battery and charger (matched to the kit voltage)
- Battery mounting hardware
- Basic bicycle tools
- Cable ties and electrical tape for cable management
DIY Installation Guide
Installation takes two to five hours depending on experience. Here is the process:
Step 1: Remove the existing wheel. If converting the rear, remove the cassette or freewheel from your old wheel and install it on the motor wheel. You will need a cassette lockring tool and chain whip, or a freewheel removal tool.
Step 2: Install the torque arm. This is critical for safety. The torque arm clamps around the axle and bolts to the frame, preventing the axle from spinning in the dropout under motor power. Without a torque arm, the axle can work loose and the wheel can detach. Always install the torque arm.
Step 3: Mount the motor wheel. Slide the axle into the dropouts and tighten the axle nuts firmly. Ensure the wheel is centred and the torque arm is secured to the frame.
Step 4: Install the display, throttle, and brake levers. These mount on the handlebars. Remove grips as needed to slide components into position. The display typically sits on the left side where it is easy to read.
Step 5: Install the pedal assist sensor. The PAS disc mounts on the bottom bracket spindle, and the sensor attaches to the frame nearby. The disc's magnets pass the sensor as you pedal, telling the controller you are pedalling. Alignment needs to be close (within a few millimetres) for reliable operation.
Step 6: Mount the controller. Find a protected location and secure it with cable ties or a mounting bracket. Keep it away from water spray and heat sources.
Step 7: Mount and connect the battery. Install your battery mount, click the battery in, and connect the main power cable to the controller.
Step 8: Connect all wiring. Hub motor kits use waterproof connectors that are keyed so they only fit in the correct socket. Connect display, throttle, brake levers, PAS sensor, and motor cable to the controller. Tidy excess cable with zip ties.
Step 9: Test. Turn on the system, check the display works, test throttle response with the rear wheel lifted, and verify brake cutoffs engage when you squeeze the brake levers. Take a short test ride on a quiet street.
Maintenance
Hub motors require very little maintenance. Geared hub motors may eventually need internal gear replacement after 10,000 to 20,000 kilometres, but this is straightforward. Direct-drive motors have no wearing parts beyond the bearings, which last for many thousands of kilometres.
Keep connectors clean and dry. Inspect the torque arm regularly. Check spoke tension periodically since the motor's weight and torque can loosen spokes over time.
Budget and Expectations
A complete hub motor conversion in Australia costs roughly:
- Basic 250W front kit with battery: $500 to $800 AUD
- Mid-range 500W rear kit with battery: $800 to $1,400 AUD
- High-power 1,000W+ rear kit with battery: $1,200 to $2,000 AUD
These prices assume purchasing from an Australian supplier with local warranty support. Direct imports from overseas can be cheaper but come with shipping risks, potential customs delays, and no local warranty.
For most riders, a hub motor conversion is the most accessible way to build a capable e-bike on a budget. The installation is within reach of anyone who can change a bicycle tyre and follow instructions carefully.
Need Parts or Upgrades?
Find batteries, chargers, conversion kits, tyres and brakes for e-bikes, scooters and more.
Shop Batteries, Parts & Kits →